

 doris@jshnbuzzer.com
A beginner's guide to piezo buzzers: selection, wiring, and troubleshooting
 Mar 30, 2026|
 View:4838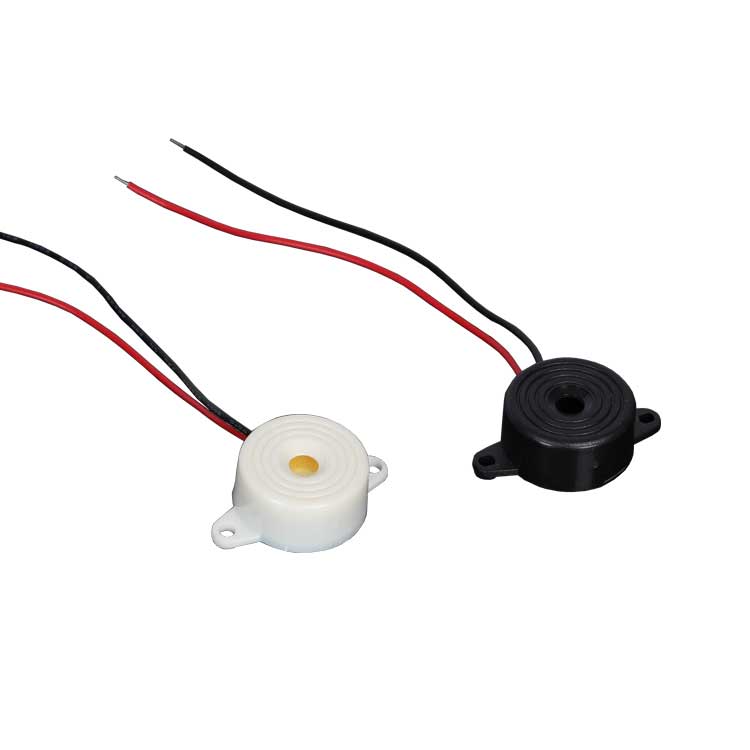
If you want to use a piezo buzzer in your project, you need to know how to pick the right one, wire it up, and fix it if it stops working. A piezo buzzer uses a piezo element to make sound. You hear these buzzers in microwaves, washing machines, and even toys. They give alerts, reminders, and sound effects. You also find piezo buzzers in doorbells, alarm clocks, and game equipment. Jiangsu HUAWHA Electronics Co., Ltd. makes reliable piezo buzzers for many uses. Learning these basics helps you build smarter electronics. This tutorial will get you started.
Key Takeaways
Pick the best piezo buzzer for your project. Think about things like voltage, size, and sound type.
Wiring a piezo buzzer is easy. Connect the positive pin to a digital output on your Arduino. Connect the negative pin to ground.
Test your buzzer often to find problems early. Use a multimeter to check the wires and voltage.
Follow safety tips when you work with circuits. Make sure all wires are tight and do not overload the buzzer.
Piezo Buzzer Basics
What Is a Piezo Buzzer
You may wonder why a piezo buzzer is different. A piezo buzzer is a small part that makes sound with a piezo element. When you put voltage on it, the piezo material bends and shakes. This shaking makes the buzzer give off a clear sound. Most piezo buzzers have a circuit inside, so you just connect power to use them. You can use a piezo buzzer with an arduino to make beeps, alarms, or simple songs.
The sound comes from the piezo effect. When you send electricity to the piezo disc, it moves back and forth very fast. This movement pushes air and makes the sound you hear. Piezo buzzers do not use much current, so you can power them right from an arduino pin. You will often hear a high sound, usually between 2,000 and 4,000 Hz, which most people can hear easily.
Jiangsu HUAWHA Electronics Co., Ltd. makes piezo buzzers in many sizes. Their buzzers work with voltages from 3V to 24V, so you can use them in small gadgets or big machines. You get a strong and steady sound every time.
Tip: If you want to play music or different notes, try a passive piezo buzzer. For a simple beep, use an active one.
Feature | Active Piezo Buzzers | Passive Piezo Buzzers |
|---|---|---|
Sound Generation | Makes sound by itself | Needs a signal from arduino |
Internal Circuit | Has built-in circuit | No built-in circuit |
Frequency Control | Fixed tone | You control the tone |
Power Consumption | Uses more power | Uses less power |
Use Cases | Alarms, appliances | Games, arduino projects |
Common Applications
You can find a piezo buzzer in many places. At home, buzzers beep in microwaves, washing machines, and alarm clocks. In cars, they remind you to buckle your seatbelt or warn if a door is open. Hospitals use piezo buzzers in medical tools like thermometers and patient monitors. Factories use them for safety alarms and machine alerts.
Jiangsu HUAWHA Electronics Co., Ltd. gives piezo buzzers to many industries. Their buzzers fit in small things like blood glucose meters and smart wearables. You can also use them in security systems, electric bikes, and smart home gadgets. The wide voltage range means you can pick the right buzzer for your arduino project, whether you need a soft beep or a loud warning.
Here are some common uses for piezo buzzers:
Home appliances: timers, reminders, and alerts
Automotive: parking sensors, seatbelt warnings
Medical: infusion pumps, diagnostic tools
Security: smoke alarms, gas detectors
IoT and arduino: smart locks, wireless sensors
If you follow this tutorial, you will learn how to use a piezo buzzer in your own arduino project. You will see how easy it is to add sound to your ideas.
Choosing a Piezo Buzzer
Selection Criteria
You want your project to work well. Picking the right piezo buzzer is important. You need to know what matters most. Look at the drive signal, sound pressure level, footprint, and circuit design. These things help you decide if a piezo buzzer fits your arduino project.
Here’s a table that compares piezo buzzers and magnetic buzzers:
Criteria | Piezo Buzzer | Magnetic Buzzer |
|---|---|---|
Drive Signal Characteristics | Voltage-driven, higher voltage (12V-220V) | Lower voltage, higher current required |
Sound Pressure Level (SPL) | Typically higher SPL | Generally lower SPL |
Footprint | Tends to have a larger footprint | Smaller footprint |
Type | Can be indicator or transducer | Can be indicator or transducer |
Circuit Design Complexity | Requires external circuitry for transducer | Built-in circuitry for indicator |
You want a buzzer that works with your circuit. Jiangsu HUAWHA Electronics Co., Ltd. has piezo buzzers with many features. You can pick SMD or mini types. You can choose the voice frequency and sound pressure level. There are options for working voltage, current compatibility, and power use. Decide if you need an active or passive buzzer. You can even change the sound. Reliability and lifespan are important. Pick a buzzer from a trusted brand.
Tip: Always check certifications. Jiangsu HUAWHA Electronics Co., Ltd. buzzers have ISO 9001, ISO 13485, and FDA registration. These certifications mean you get quality and safety.
Here’s a table showing how certifications help reliability:
Certification | Implication for Reliability |
|---|---|
ISO 9001:2015 | Shows a focus on quality management |
ISO 13485:2016 | Meets medical device rules |
FDA Registration | Follows safety and effectiveness standards |
You get over 15 years of experience and good performance. Buzzers from Jiangsu HUAWHA Electronics Co., Ltd. last a long time.
Matching Voltage and Size
You need to match the voltage and size of your piezo buzzer to your circuit. If you don’t, you might have buzzer voltage problems. Here’s what matters:
Make sure the operating voltage fits your circuit. If your arduino runs at 5V, pick a buzzer that works at 5V.
Choose low current use for battery-powered devices. This helps your project last longer.
Check the resonant frequency. It affects sound quality and loudness.
Look at the sound pressure level. You want enough loudness for your project.
Check impedance. It must match your circuit to avoid problems.
Pick a mounting style that fits your device.
Confirm the size. Your buzzer must fit in the space you have.
Here’s a table to help you:
Factor | Importance |
|---|---|
Operating Voltage | Must match the circuit's voltage to work right. |
Current Consumption | Should be low for battery devices to save energy. |
Resonant Frequency | Changes the sound quality and how well the buzzer works. |
Sound Pressure Level (SPL) | Decides how loud the buzzer is. |
Impedance | Needs to fit the circuit to avoid issues. |
Mounting Style | Affects how you install it in your device. |
Size | Must fit in the space you have. |
The thickness of the piezo disc changes the sound. Thinner discs make higher sounds. Thicker discs make lower sounds. The size and shape of the resonating membrane also change the sound and loudness. Bigger piezo buzzers give louder sound. You use them in factories or alarms. Smaller buzzers save space and power. They fit in arduino projects and wearables.
Piezo buzzers work well at higher voltages with low current. They can make loud sounds up to 110 dB. Their light and small design makes them good for portable devices. If you need a loud buzzer for a big circuit, pick a bigger one. If you want a tiny buzzer for a smart gadget, pick a smaller one.
Application Guide
You want your arduino project to beep, alert, or play a tune. This guide helps you pick the right piezo buzzer for your project. Follow these steps:
Think about what your device does. Is it for audio, robotics, or alarms?
Check the voltage and current. Make sure your buzzer matches your circuit and avoids buzzer voltage problems.
Choose a buzzer from a good manufacturer. Jiangsu HUAWHA Electronics Co., Ltd. uses advanced technology for long-lasting buzzers.
Look for certifications. You want buzzers with ISO and FDA approvals for safety.
You can use piezo buzzers in many ways. Try them in arduino projects, home appliances, medical devices, or security systems. Pick the right size and voltage for your circuit. Make sure the sound fits your needs. If you want a soft beep, use a small buzzer. If you need a loud alarm, use a bigger one.
Note: Always check the wiring guide in your tutorial. Proper wiring keeps your buzzer safe and avoids buzzer voltage problems.
Jiangsu HUAWHA Electronics Co., Ltd. gives you reliable piezo buzzers for every use. You get sound choices, long life, and trusted performance. This guide helps you pick the best buzzer for your arduino project. You can build smarter circuits and add sound to your ideas.
Piezo Buzzer Wiring Guide
Tools and Materials
Get all your tools and materials before you start. This helps you work faster and makes things easier.
Piezo buzzer (Jiangsu HUAWHA Electronics Co., Ltd. is a good brand)
Arduino board
Breadboard
Jumper wires
Soldering iron (for a permanent circuit)
Wire strippers
Multimeter (to test your circuit)
Capacitors and resistors (for extra stability)
Strong base like wood or plastic
Having these things ready will make wiring simple.
Wiring Steps
Follow these steps to wire your piezo buzzer. The process is easy and fun.
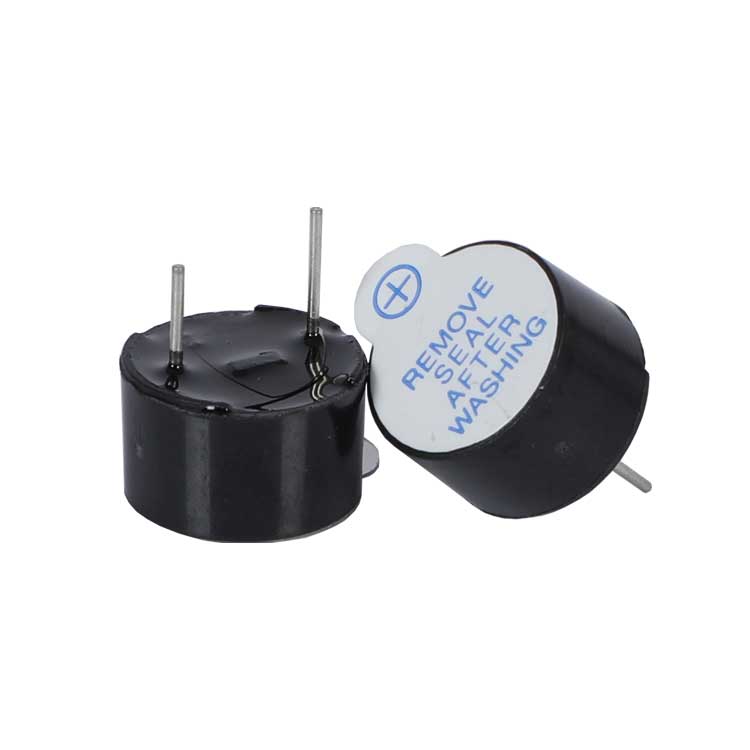
Find the pins on your piezo buzzer. The longer pin is positive.
Put the buzzer on the breadboard.
Connect the positive pin to a digital output on your Arduino.
Connect the negative pin to the ground (GND) on the Arduino.
Add a pull-down resistor if you want to stop false signals.
Check all your connections before you turn on the power.
Tip: Use a square wave at the buzzer’s resonant frequency for the best sound. The pitch will change if you use a different frequency.
Connecting to Arduino
It is easy to connect your piezo buzzer to an Arduino. Attach the positive lead to digital pin 3. Attach the negative lead to ground with jumper wires. Now you can control the buzzer with your code. Here is a simple code example:
int buzzerPin = 9;void setup() { pinMode(buzzerPin, OUTPUT);}void loop() { tone(buzzerPin, 2000); // 2kHz sound delay(1000); noTone(buzzerPin); delay(1000);}Upload this code to your Arduino to test your setup. You will hear a beep if your wiring is correct. This is a fun way to add sound to your Arduino project.
Safety Tips
Be careful when you work on your circuit. Here are some safety tips:
Always follow the wiring diagram in your guide.
Use the right wire size and make sure all connections are tight.
Ground your circuit to stop shocks.
Do not overload the buzzer. Make sure the load matches the rated capacity.
Test your circuit with a multimeter before you run the whole project.
If you use a piezo buzzer from Jiangsu HUAWHA Electronics Co., Ltd., you get good performance and voltage compatibility for any Arduino. Careful wiring and safe habits help your project last longer and sound better.
Troubleshooting Piezo Buzzer Issues
If your piezo buzzer has problems, don’t panic. You can fix most problems with some easy steps. Let’s look at common buzzer circuit issues and how to solve them.
Buzzer Not Working
You turn on your project, but the buzzer stays silent. This happens a lot to beginners. Here are some main reasons:
Voltage issues: If the voltage is too low, the buzzer will not sound.
Control failures: If the buzzer is always on or off, the circuit may be broken.
Wiring problems: Loose or wrong wires stop the buzzer from working.
Broken leads or damaged parts: Sometimes, the inside of the buzzer breaks.
Start by checking the buzzer circuit. Look at all the wires and connections. Make sure the OUT and GND pins are in the right place. Use a multimeter to test if the buzzer works. If you find broken leads, open the buzzer and replace them. Sometimes, putting a resistor across the piezo leads helps with discharge. Try a fast switching diode, like a Schottky diode, to fix the buzzer. Test the buzzer straight from an I/O pin. This can work better than using a transistor.
Tip: Always use the installation guide and check your settings if you use smart apps or controllers.
Weak or Distorted Sound
If your piezo buzzer sounds weak or strange, it can be annoying. Here are some causes:
Undervoltage or not enough current: The buzzer needs enough power to work.
Poor grounding: Bad ground makes the sound uneven.
Wrong frequency: Using the wrong frequency makes the buzzer sound odd.
Too much voltage or unstable power: This can make the sound bad.
Driver saturation: If the driver is overloaded, the sound gets fuzzy.
To fix these sound problems, check the power supply. Make sure the voltage is right for your buzzer. If you use an Arduino, set the frequency to match the buzzer. Change the voltage and frequency until the sound is clear. If the sound is still bad, check the driver part for problems.
Note: If the voltage changes, the buzzer gets louder or softer. More voltage makes it louder, but too much can break the circuit.
Buzzer Circuit Diagnosis
You need a good way to check your buzzer circuit. Start by testing if the buzzer works. Use a multimeter to check the voltage at the buzzer. Debug speakers from stores help you hear if the buzzer works. Start with a 4.7k Ohm resistor and change it if needed. Always use a resistor to keep your circuit safe. Piezo buzzers usually use 6V and about 50mA.
Check all wires and connections for breaks. Make sure soldered parts are straight. Bent solder can cause shorts and stop the sound. Don’t push too hard on the pins. This can break the buzzer.
Here’s a table to help you with buzzer circuit checks:
Diagnostic Tool | Purpose |
|---|---|
Multimeter | Check voltage and continuity |
Debug Speaker | Test sound output |
Resistor (4.7k Ohm) | Protect circuit during testing |
Schottky Diode | Fix discharge issues |
Callout: Testing the buzzer directly helps you know if the buzzer or the circuit is the problem.
Step-by-Step Guide to Troubleshooting Buzzer Circuits
Here is a simple guide to fix buzzer circuits:
Check the power supply and voltage. Make sure the buzzer gets the right amount.
Look at all wires and connections. Find loose wires or wrong polarity.
Test the buzzer by itself. Take it out and use a power source to see if it works.
Check the driver part. If the buzzer works alone but not in the circuit, look at the control parts.
Fix sound quality problems. Change voltage and frequency to make the sound better.
If you follow these steps, you can fix most buzzer problems. You can also fix weak or strange sounds. Use matched transistors to make an oscillator circuit. Add resistors and capacitors to set the frequency. Change these parts to get the sound you want. Use a steady power supply for best results.
Emoji: Test your circuit after every change. This helps you find problems early.
You can use this guide for any buzzer project. Testing the buzzer is important. If you keep your circuit neat and follow the steps, your buzzer will work well. Fixing buzzer sound problems is easy when you know what to do.
Tip: Practice helps you get better. The more you fix circuits, the easier it gets to solve buzzer problems.
Maintenance and Tips
Best Practices
You want your piezo buzzer to last as long as possible. Good habits help you get reliable sound every time. Here are some best practices you can follow:
Check the buzzer often for signs of damage or wear. If you see cracks or loose parts, fix them right away.
Make sure the voltage stays within the rated limit. Too much voltage can damage the buzzer.
Use a driving circuit if your buzzer needs more current than your microcontroller can provide. This keeps your circuit safe.
Operate the buzzer at its resonant frequency. You get the best sound output this way.
Use PWM (pulse-width modulation) to adjust the volume and tone. This gives you more control over your project.
Keep wire connections secure. Loose wires can cause the buzzer to stop working.
Test the buzzer regularly. You can catch problems early and fix them before they get worse.
Tip: Stable power supply helps your buzzer work smoothly. If you use Jiangsu HUAWHA Electronics Co., Ltd. buzzers, you get reliable performance for all your projects.
Cleaning and Storage
Dust and dirt can affect your buzzer’s sound. You should clean your buzzer to keep it working well. Here’s how you can do it:
Wipe the buzzer gently with a soft, dry cloth. Avoid using water or harsh chemicals.
Remove dust and debris from the surface. This keeps the sound clear.
Check for loose connections. If you find any, re-solder them to make sure everything stays tight.
Store your buzzer in a dry place. Keep it away from extreme temperatures and moisture.
Monitor the environment. Avoid places that get too hot or cold.
Test the sound output from time to time. If the buzzer sounds weak, clean it again or check the wiring.
Note: Proper cleaning and storage extend the life of your piezo buzzer. You can enjoy clear sound and reliable alerts for years.
Maintenance Task | How Often | Why It Matters |
|---|---|---|
Inspect for damage | Monthly | Prevents failures |
Clean surface | Monthly | Keeps sound clear |
Check connections | Every use | Ensures reliability |
Test sound output | Monthly | Detects early problems |
Keeping your buzzer clean and safe makes your electronics project run smoothly. You build confidence and get better results every time.
You learned how to choose the right piezo buzzer. You learned how to wire it and fix problems. Arduino projects use buzzers for alarms and reminders. They also use buzzers for sound effects. You saw different types like transducers and indicators. You checked things like sound pressure level and resonant frequency. You matched the voltage and impedance to your circuit. You followed wiring steps with arduino and tested circuits. You solved issues with your buzzer. Buzzers are in fire alarms and microwave ovens. Arduino makes prototyping simple, especially with Grove piezo buzzers. You added sound to your arduino projects. You learned about arrays and loops. You made designs that interact with users. You got better at solving problems and saw how coding works in real life. You can try new ideas with arduino. You can use Jiangsu HUAWHA Electronics Co., Ltd. buzzers for reliable sound. Don’t worry if you make mistakes. Every arduino project helps you learn and improve.
FAQ
How do you connect a piezo buzzer to an arduino?
You connect the positive pin of the piezo buzzer to a digital pin on your arduino. Connect the negative pin to the ground. Use jumper wires for easy setup. You can control the buzzer with simple arduino code.
Can you use more than one piezo buzzer with an arduino?
Yes, you can use multiple piezo buzzers with your arduino. Assign each buzzer to a different digital pin. Write your arduino code to control each buzzer separately. This lets you create different sounds or alerts in your project.
Why does my piezo buzzer sound weak on my arduino?
Your piezo buzzer might sound weak if the arduino does not supply enough voltage. Check your wiring and make sure you use the correct digital pin. Try using the tone function in your arduino code for better sound.
What arduino projects can you make with a piezo buzzer?
You can make many fun arduino projects with a piezo buzzer. Try building alarms, timers, or simple games. Use the buzzer for sound effects in your arduino robot. You can even play simple songs using arduino code.
Do you need special code to use a piezo buzzer with arduino?
You do not need special code. The arduino IDE has a tone function that works with most piezo buzzers. Just write a few lines of arduino code to make your buzzer beep or play a melody. It is easy to get started.
Tip: Try changing the frequency in your arduino code. You will hear different notes from your piezo buzzer.


Recent News
1.How Piezo Buzzers Are Revolutionizing Wearables and Portable Electronics
2026-03-182.The Complete Guide to Piezoelectric Buzzers: What They Are and How They Work
2026-02-253.What Is a Piezo Buzzer Used For? A Complete Guide
2025-12-264.How to Use a Tiny Piezo Buzzer in Your Electronics Projects
2026-02-055.Active vs Passive Piezo Buzzers vs Electromagnetic Buzzers: How to Choose in 2026
2026-01-296.Top 10 Buzzer Manufacturers in 2025
2026-01-167.Which Is Better, an Active or Passive Buzzer?
2025-11-03