Step-by-Step Guide to Making Different Sounds with Piezo Buzzers
 May 09, 2026|
 View:333
You can make different sounds with a passive piezo buzzer by changing the frequency and timing of the square wave signals you send. Have you ever wanted your project to play a melody or beep for alerts? Try new patterns and see what happens. High-quality components from Jiangsu HUAWHA Electronics Co., Ltd. give you reliable results every time.
Key Takeaways
Experiment with different frequencies and durations to create unique sounds with your piezo buzzer.
Understand the difference between active and passive buzzers to ensure compatibility with Arduino's
tone()function.Use loops and arrays in your code to play melodies and organize your sound patterns effectively.
Piezo Buzzer Basics
How Piezo Buzzers Work
You can find a piezo buzzer in many electronic devices. Unlike magnetic buzzers, a piezo buzzer uses a piezoelectric ceramic material. When you apply an alternating voltage (square wave signal) to this material, it rapidly changes shape and vibrates. These vibrations create sound waves that you hear as a beep or tone. You control the sound by changing the frequency of the signal. A higher frequency makes a higher-pitched sound. A lower frequency gives you a deeper tone.
Pro Tip: Resonant Frequency. Every piezo buzzer has a specific resonant frequency (e.g., 4kHz) where it produces the maximum volume. While you can change the frequency to create different pitches, driving the buzzer far from its resonant frequency will result in a much quieter sound.
Piezo Buzzer Types & Specifications
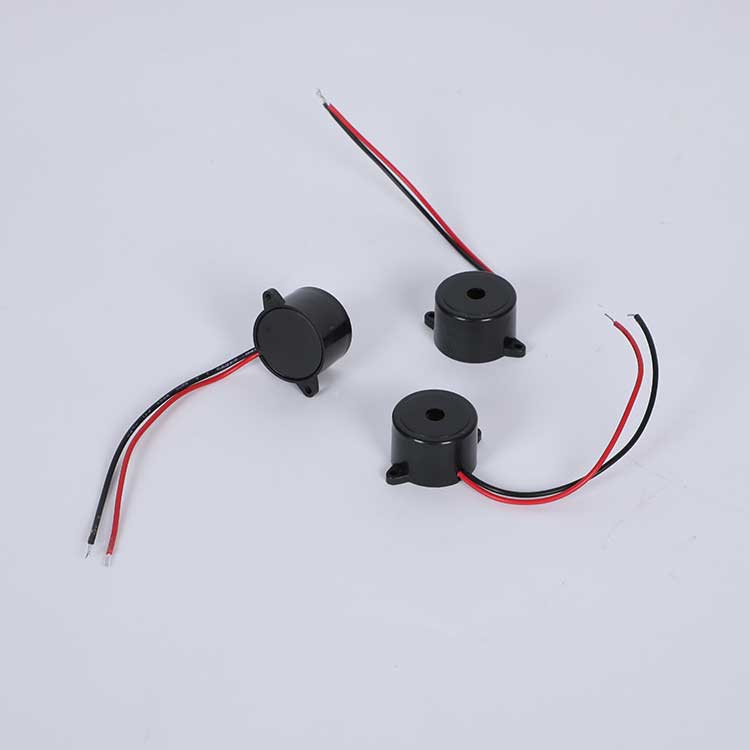
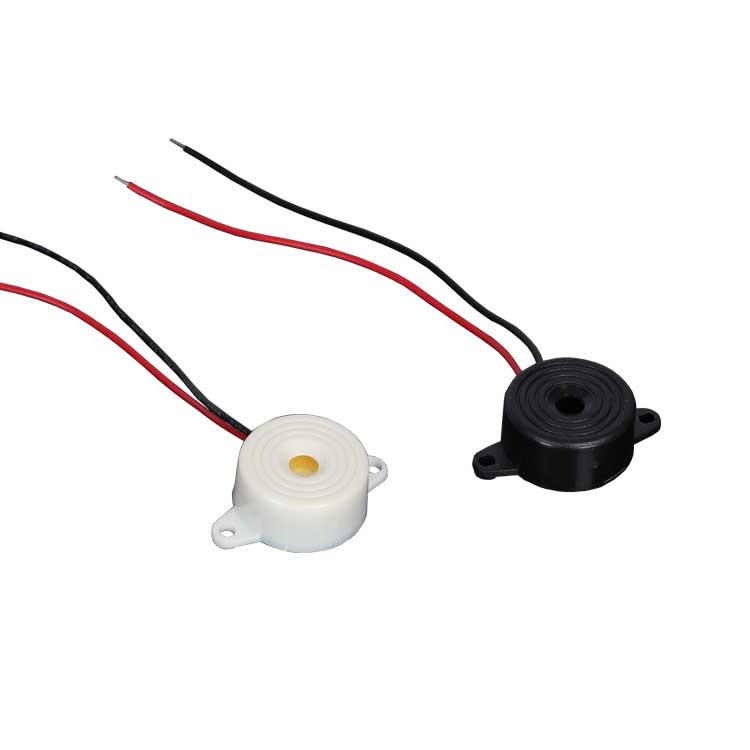
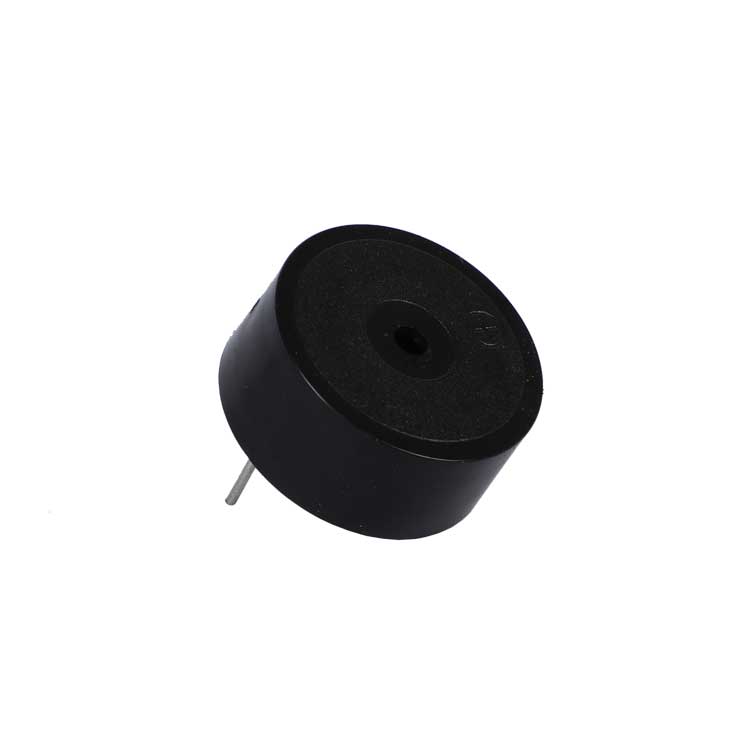
Jiangsu HUAWHA Electronics Co., Ltd. stands out as a top manufacturer of piezo buzzers, offering both active and passive types. Their passive piezo buzzers are optimized for small devices, with widths ranging from 4 mm to 9 mm. These buzzers support standard operating voltages from 3V to 24V DC, ensuring seamless integration with various electronic systems. They are widely used in medical devices (like blood glucose meters), home appliances, automotive systems, and alarm systems.
Feature | Details |
|---|---|
Size Range | 4 mm – 9 mm |
Voltage Range | 3V – 24V DC |
Certifications | ISO 9001, ISO 14001, CE, RoHS, SGS |
Applications | Medical, automotive, IoT, alarms |
You can rely on these buzzers for stable performance in many environments, backed by rigorous quality control.
Materials and Tools
Essential Components
You need a few basic items to get started with your piezo buzzer project. First, choose a quality passive piezo buzzer. This ensures you can control the frequency using your microcontroller. Next, use a microcontroller like an Arduino Uno. This board lets you control the buzzer and program different sounds. You also need jumper wires to connect the buzzer to the Arduino. A breadboard helps you build your circuit without soldering. You should have a USB cable to power the Arduino and upload your code.
Tip: Always double-check your connections before powering up your circuit. This helps prevent short circuits and protects your components.
Optional Tools
You can use extra tools to make your project easier or more advanced. A multimeter helps you check voltages and troubleshoot problems. If you want to make your project permanent, use a soldering iron and some solder. For more complex sound experiments, try using an oscilloscope to visualize the square wave signals. Some people use push buttons or sensors to trigger different sounds. You can also add LEDs to give visual feedback when the buzzer sounds.
Piezo Buzzer Circuit Setup
Simple Wiring Steps
You can set up a passive piezo buzzer with an Arduino in just a few steps. Follow these instructions to connect everything safely and correctly:
Place your piezo buzzer on the breadboard. Make sure the pins do not touch each other.
Connect one pin of the buzzer to a digital pin on the Arduino, such as pin 8. Use a jumper wire for this connection.
Attach the other pin of the buzzer to the GND (ground) pin on the Arduino. This completes the circuit.
Plug your Arduino into your computer using a USB cable.
Open the Arduino IDE on your computer. You will use this program to upload code and control the buzzer.
Note on Polarity: Passive piezo buzzers require an AC signal to vibrate, so they typically do not have strict positive/negative polarity and will work regardless of which pin connects to the signal. However, if you are using an active buzzer (which has a built-in oscillation source), you must connect the positive pin to the signal and the negative to GND.
Here is a simple wiring diagram in text form:
Arduino Pin 8 ----> Buzzer Pin 1
Arduino GND   ----> Buzzer Pin 2
You can now upload a basic tone code to test your setup. If you hear a beep, your wiring works!
Common Mistakes
Many beginners make small errors when wiring a piezo buzzer. You can avoid these mistakes by checking your work at each step.
Using an Active Buzzer instead of a Passive one: The
tone()function requires a passive buzzer. If you use an active buzzer, it will only produce a single fixed pitch regardless of the frequency in your code.Loose connections: Jumper wires can slip out of the breadboard. Push each wire in firmly.
Wrong Arduino pin: Make sure you connect the buzzer to the same digital pin you use in your code. For example, if your code uses pin 8, connect the wire to pin 8.
No ground connection: The circuit needs a complete path. Always connect one pin of the buzzer to GND.
Note: Double-check your wiring before you power up the Arduino. This step prevents short circuits and protects your components.
If you follow these steps and tips, you will set up your piezo buzzer circuit correctly.
Programming Sounds
Basic Tone Code
You can make your piezo buzzer play sounds by writing simple Arduino code. The Arduino has a built-in function called tone() that sends a square wave signal to the buzzer. This function lets you choose which pin to use, what frequency to play, and how long the sound lasts.
Here is a basic example:
// Connect your passive piezo buzzer to pin 8 and GND
void setup() {
  // No setup needed for tone
}

void loop() {
  tone(8, 1000, 500); // Play 1000 Hz tone on pin 8 for 500ms
  delay(500);         // Wait for 500ms (creates a pause between beeps)
}
You can upload this code to your Arduino. The buzzer will beep for half a second, then stay silent for half a second. The tone() function makes it easy to start experimenting with different sounds.
Tip: Change the frequency in the code to hear different pitches. Try values like 500, 1500, or 2000. Remember that volume will peak near the buzzer's resonant frequency.
Frequency and Duration
You control the sound of your buzzer by changing two main things: frequency and duration. Frequency decides how high or low the sound is. Duration decides how long the sound lasts.
Frequency: Measured in Hertz (Hz). Higher numbers make higher-pitched sounds. Lower numbers make deeper sounds.
Duration: Measured in milliseconds (ms). Longer durations make the sound last longer.
Here is a table showing how different values affect the sound:
Frequency (Hz) | Pitch | Duration (ms) | Effect |
|---|---|---|---|
500 | Low | 100 | Short, deep beep |
1000 | Medium | 500 | Medium beep |
2000 | High | 1000 | Long, sharp beep |
You can use PWM (Pulse Width Modulation) principles to create more complex sound patterns. The Arduino tone() function handles this automatically. You can combine different frequencies and durations to make melodies or alert sounds.
Try changing the values in your code. For example:
tone(8, 2000, 1000); // Play a high tone for 1 second
delay(1200);         // Pause
tone(8, 500, 200);   // Play a low tone for 0.2 seconds
delay(400);          // Pause
You can mix and match these values to create unique sound effects.
Note: Always use voltages within the recommended range for your buzzer. HUAWHA piezo buzzers work reliably from 3V to 24V DC and handle a wide range of frequencies.
You now know how to program your buzzer to make different sounds. Try new patterns and see how the sound changes. This skill helps you build alarms, notifications, or even simple music with your projects.
Creating Melodies
Using Loops
You can make your piezo buzzer play simple songs by using loops and arrays in your Arduino code. Start by creating two arrays. One array holds the notes as frequencies. The other array holds the note durations. Use a for loop to step through each note and play it in order. This method helps you organize your code and makes it easy to change the melody.
Here is a basic example:
int melody[] = {262, 294, 330, 349, 392, 440, 494, 523}; // C major scale
int noteDurations[] = {250, 250, 250, 250, 250, 250, 250, 250};

void setup() {
  for (int i = 0; i < 8; i++) {
    tone(8, melody[i], noteDurations[i]);
    delay(noteDurations[i] * 1.3); // Add a short pause between notes
  }
}

void loop() {
  // No code needed here, melody plays once in setup
}
Tip: Change the numbers in the arrays to create your own tune.
Sound Patterns
You can experiment with timing and patterns to make your melody unique. Try changing the order of the notes or the length of each note. Use different delays to add rhythm. You can repeat sections or skip notes to create interesting effects. Add rests by using a duration of zero or by adding extra delays. Listen to how each change affects the sound. This process helps you learn how music works with electronics.
Troubleshooting Tips
No Sound Issues
You may find that your piezo buzzer does not make any sound. This problem can happen for several reasons. Start by checking your wiring. Make sure each wire connects firmly to the correct pin on your Arduino and the buzzer.
If you still hear nothing, check your power supply. Your Arduino must have enough voltage to run the circuit. Try using a different USB cable or battery pack. If your project uses a battery, make sure it is not empty. You can also test your buzzer with a simple code to rule out hardware problems.
Tip: Ensure your signal voltage matches the buzzer's rating. HUAWHA buzzers are available in 3V, 5V, 12V, and 24V versions. Driving a 3V buzzer with 5V might damage it, while driving a 24V buzzer with 5V will result in very low volume.
Debugging Code
Sometimes, the problem comes from your code. Check that you use the correct pin number in your tone() function. If your buzzer connects to pin 8, your code should match. Look for typos or missing lines. Use the Serial Monitor in the Arduino IDE to print messages and track what your code does.
Here is a quick checklist:
Confirm the pin number in your code matches your wiring.
Make sure you are using a passive buzzer, not an active one.
Test your buzzer with a basic example code.
Watch for error messages when uploading code.
You can solve most problems by following these steps. Careful checks help your project work every time.
Advanced Experimentation Ideas
Multiple Buzzers & Hardware Limits
You might want to take your project to the next level by using more than one piezo buzzer to play chords. However, it is important to understand a hardware limitation: the standard Arduino tone() library relies on a single hardware timer, meaning it can only generate one tone at a time.
If you call tone() on a second pin, it will stop the tone on the first pin. To use multiple buzzers, you must sequence them rapidly or use specialized multi-channel timer libraries. Here is how you can sequence them:
// Standard Arduino can only play ONE tone at a time.
// This code sequences two buzzers rapidly.
void loop() {
  tone(8, 1000, 200); // Play first buzzer
  delay(300);
  tone(9, 1500, 200); // Play second buzzer
  delay(300);
}
You can experiment with timing and frequency to create complex alert patterns. HUAWHA piezo buzzers work well in multi-buzzer setups because they offer reliable performance and consistent sound quality across their voltage range.
Tip: Label each wire and pin. This step helps you avoid confusion when you build larger circuits.
Adding Sensors
You can add sensors to your project to trigger sounds automatically. Try using a button, light sensor, or motion detector. When the sensor activates, your buzzer can play a tone or melody. This method works for door alarms, notification systems, or interactive games. Use a table to plan your sensor actions:
Sensor Type | Action | Sound Effect |
|---|---|---|
Button | Press | Short beep |
Light Sensor | Detects light | Rising melody |
Motion Sensor | Movement | Alert tone |
You can combine sensors and buzzers for creative projects. HUAWHA piezo buzzers fit many applications, from medical devices to home security systems. You can explore new ideas and build smarter electronics.
Try new combinations and see how your project responds. You will discover many possibilities with sensors and buzzers.
You learned how to wire, code, and experiment with piezo buzzers. Try new sounds and share your projects online. For high-quality, ISO-certified buzzers for your next commercial or DIY project, visit Jiangsu HUAWHA Electronics Co., Ltd.. Keep exploring—your creativity can turn simple beeps into amazing inventions!